Manfrotto 410 Junior Geared Head repair

Through rain and shine, frequent bouts of frantic knob twirling and regularly being unceremoniously lobbed into the car, my trusty Manfrotto geared head has always performed flawlessly... well, until now that is.
Like most Manfrotto tripod heads, the 410 Junior Geared Head (to give it it's full title) has a sprung brass pin that triggers the arm to close and llock the quick release plate (and camera) in place. This pin sits inside a hole in the top plate and over time as moisture seeps in these have a habit of corroding and as there isn't much clearance between the pin and the hole this causes it to get stuck... which is what happened to mine. Seems the rain and shine part might have been the problem.
My initial thought was to soak it in WD40, which had no effect, my second was to tap it with something heavy to try and free it which was equally as ineffective and I began to think a whole new top plate was going to be in order. A quick email to the people at Manfrotto spares to check whether that was indeed the case (and at £44 + VAT I was rather hoping it wasn't) revealed that not only was it going to cost me less than £4 but was also given advice on how to go about fixing it... so I thought I'd share.
Tools
3mm hex key, 14mm spanner or socket, drill and small drill bit (2-3mm)
Parts
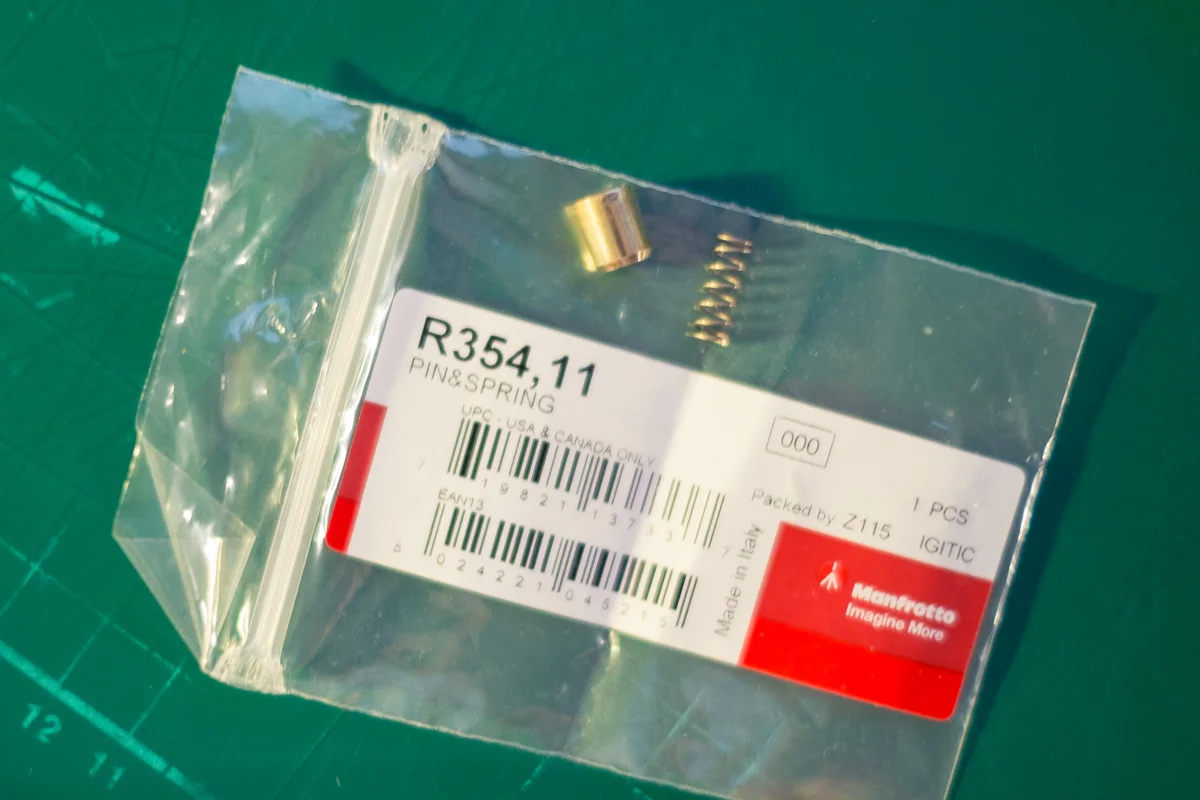
R354,11 Pin & spring (available from www.manfrottospares.com/en/410-parts.html where there is also a diagram of parts)
Removing the stuck pin
Start by removing the locking lever by undoing the hex bolt underneath the top plate using the 3mm hex key. Take care not to lose the little spring from inside the arm which is likely to ping out and bounce off in a random direction taking you 35 minutes to find (learnt that the hard way).
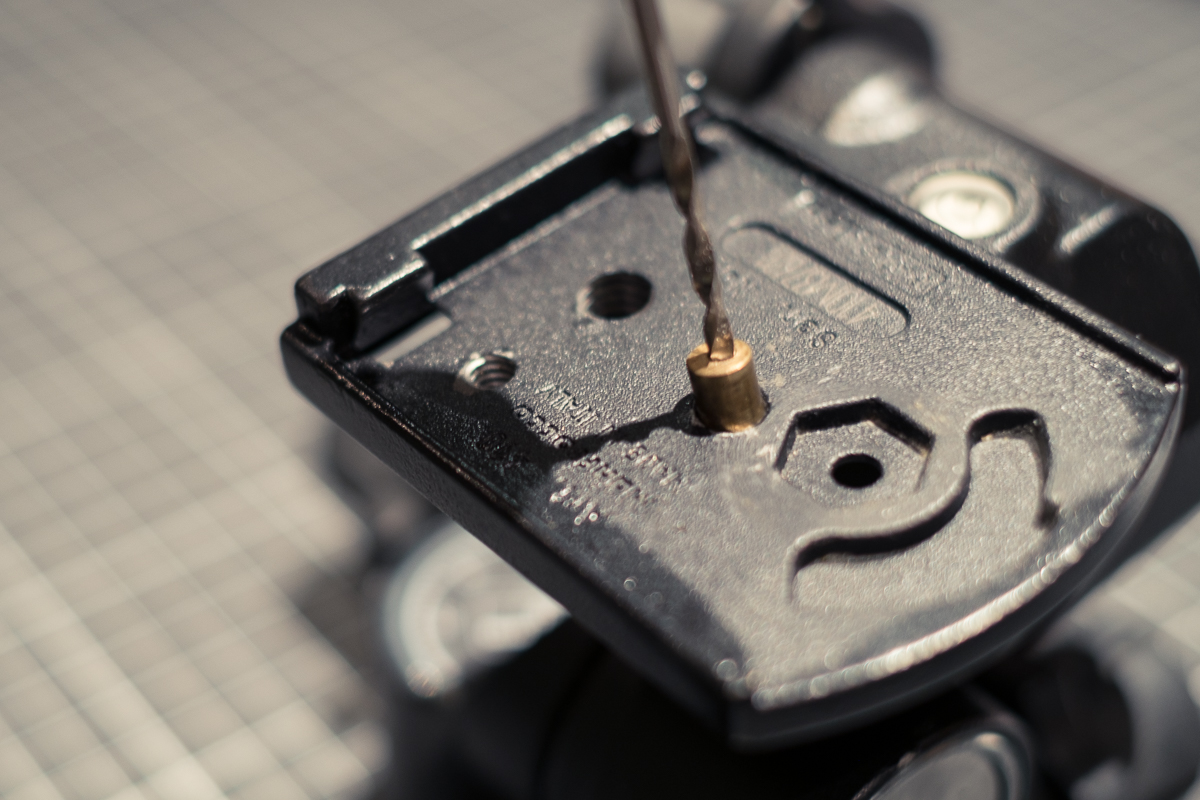
Then with the arm removed use the drill and slowly drill a hole in the top of the brass pin (which is actually hollow). Once through the top of the pin it should pull out as you remove the drill bit but if it's still stuck fit a screw into the hole and use a pair of pliers to yank it out.

Reassembly
Thoroughly clean the hole of any corrosion (which is easier said than done) and then drop in the new spring and brass pin. It will just wobble around uselessly for now until the arm is re-fitted which is where it gets a bit fiddly.
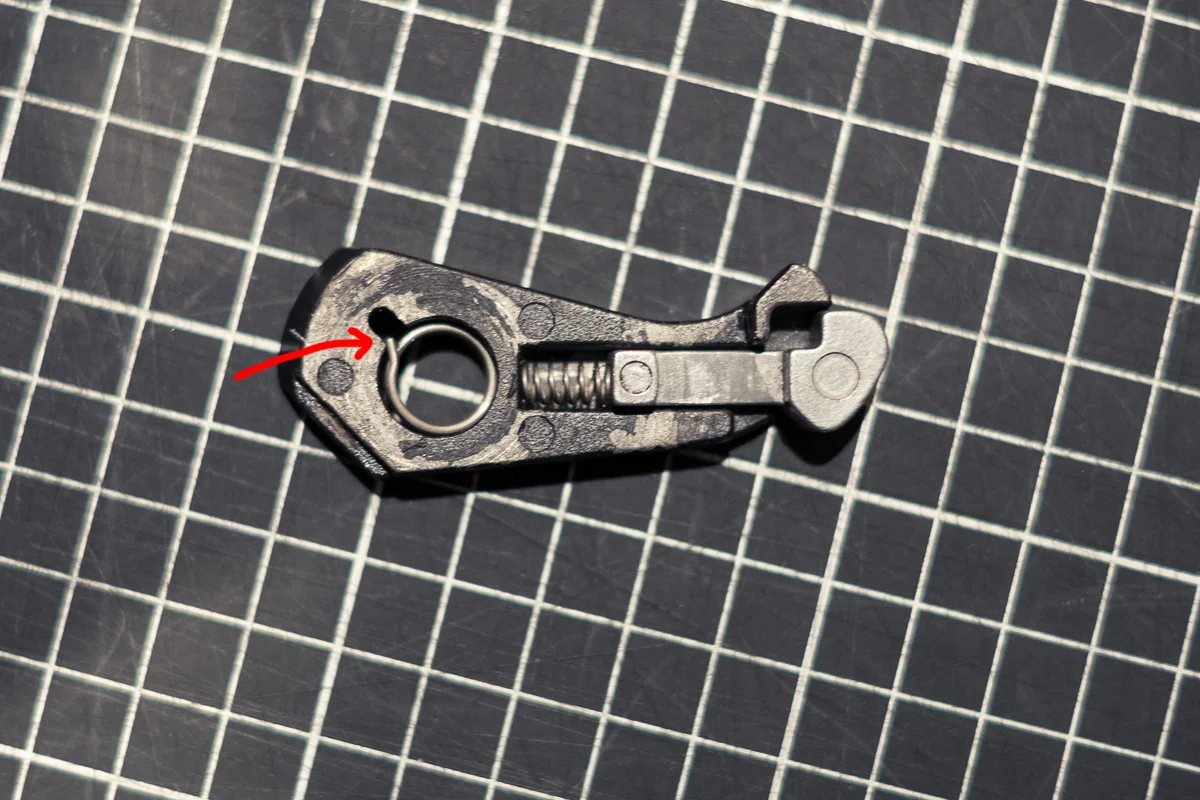
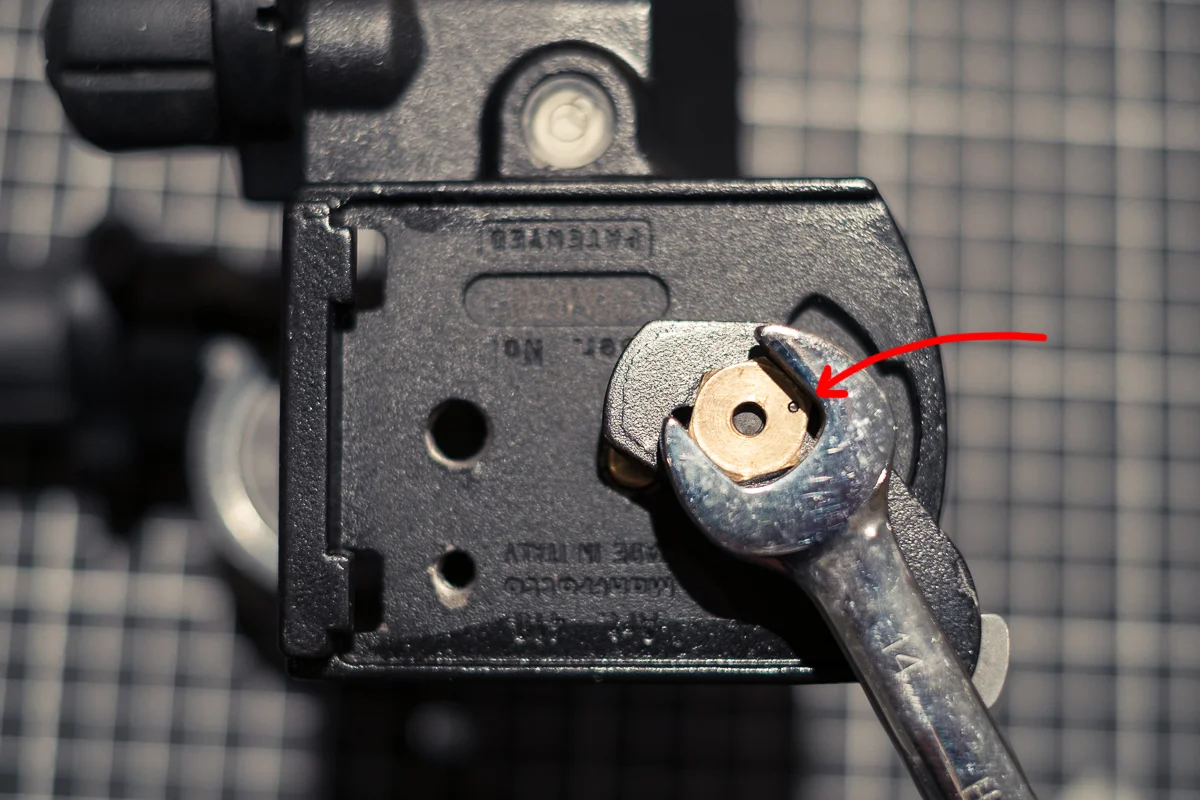
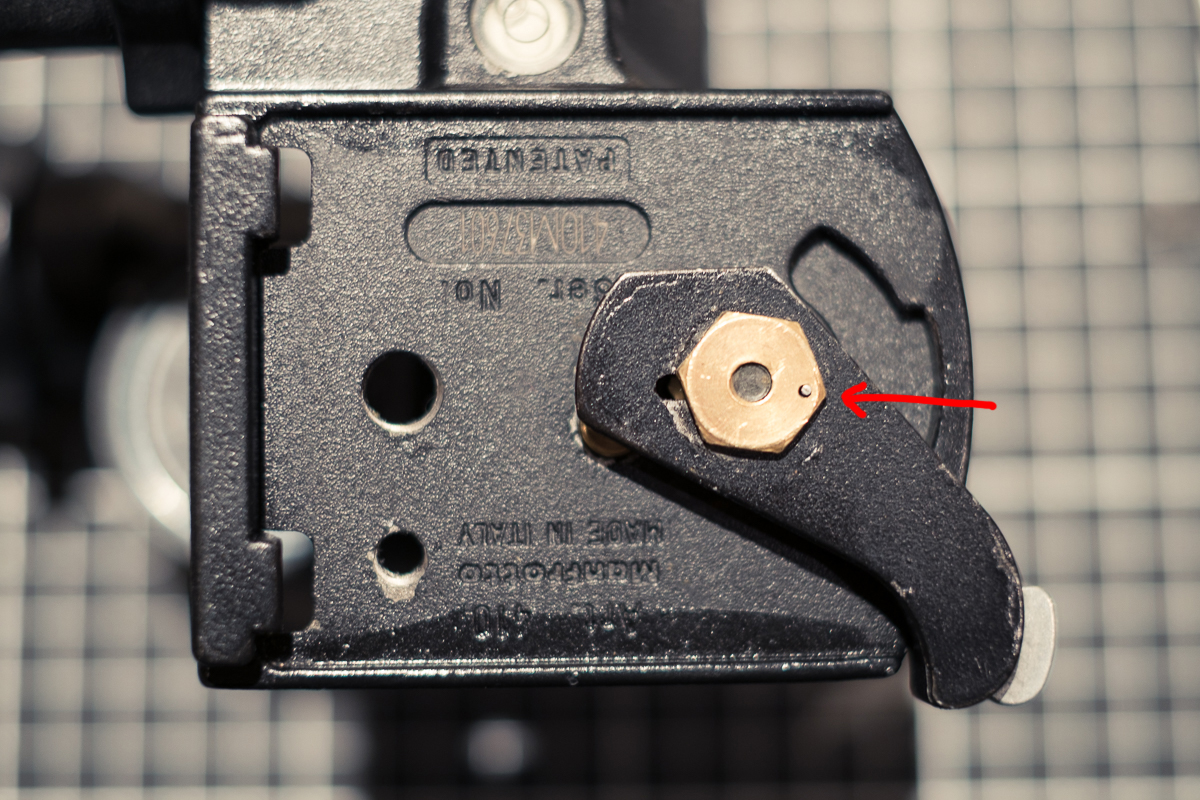
Firstly put the lower brass nut in the recess on the top plate then assemble the arm following the image below, taking care that the end of the spring is located in the recess (arrowed).
Position the tripod head in front of you so the arm will be pointing out to the right. Locate the arm on arm on the top plate and then fit the brass nut on top making sure the top of the spring fits in the hole in the brass nut (arrowed in the image below). The arm needs to be positioned so it is pointing as far down as possible (about the 5 o'clock position) and the hole in the nut should be at roughly 9 o'clock (as the image below). With everything in position do up the hex bolt underneath but don't fully tighten it.
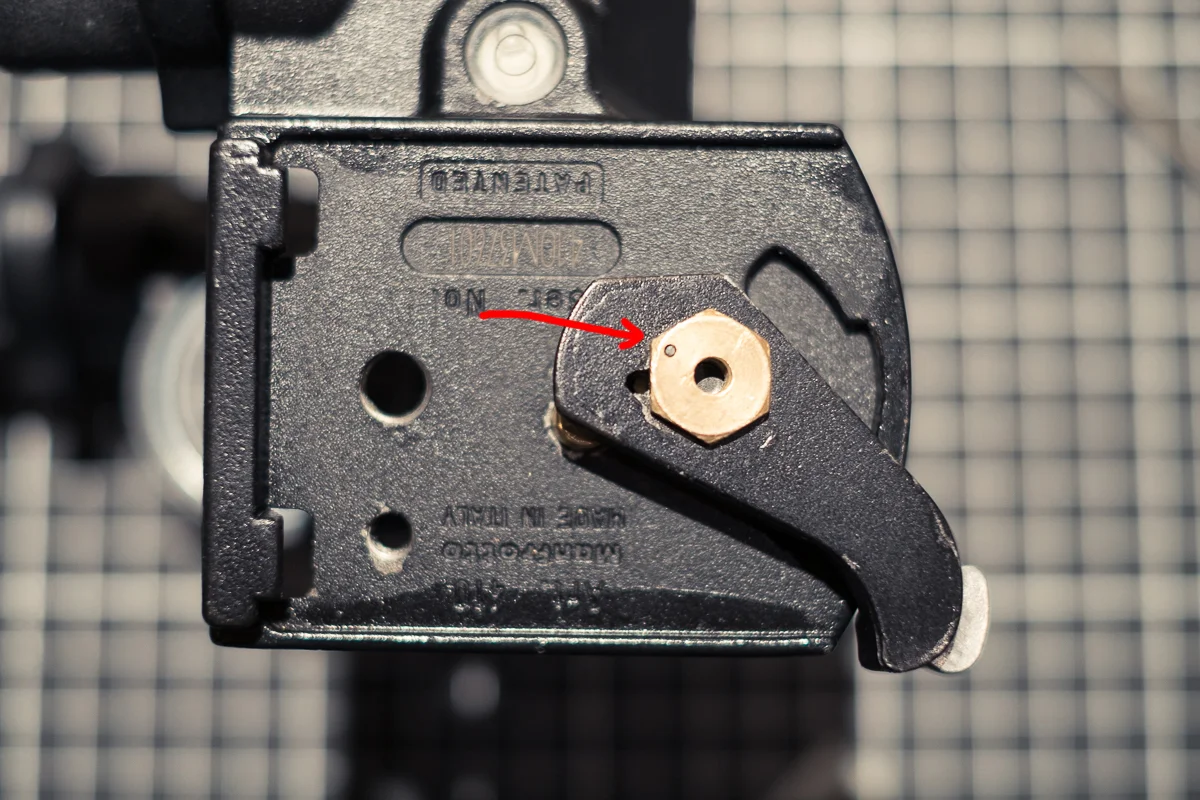
Now the spring in the arm needs to be tensioned before tightening everything up, so using the spanner, turn the nut until the small hole is in the 3 o'clock position and hold it there (arrowed in the image below). Keeping the spanner in that position, fully tighten the hex bolt underneath to the precise torque setting of 'tight but not too tight'. The arm should now be tensioned, return it to the upward position and try it out. The quick release plate should snap into place, if it feels a bit sloppy then loosen the hex bolt off and try moving the hole in the top nut further clockwise before re tightening the hex bolt. If it feels a bit too tight then do the same thing but move it anti-clockwise.
And that's it!
Finally, I must thank the people at Manfrotto spares for getting the parts out to me so quickly and then taking the time to talk me through the process over the phone, I would never have managed to get the thing working again without you, great service.
Final, final thing, I am obviously not a technician and so you follow my advice at your own risk, if you need advice on this or any other problem relating to Manfrotto gear then get in touch with the people at www.manfrottospares.com, they're very helpful.